So, we're talking about tension stress today. It's basically when you pull on something, like a rope or a metal bar, and it wants to stretch. Understanding how this pulling force affects materials is pretty important, especially if you don't want things breaking unexpectedly. We'll look at how different materials act under this kind of stress, what's happening inside them, and how we can test and design things to be safer.
Key Takeaways
- Tension stress makes materials stretch, and how much they stretch before breaking tells us a lot about them.
- Materials like metals can bend and stretch a lot before they break, which is why they're often used in construction.
- Tiny flaws or changes in a material can make it much weaker when tension stress is applied.
- Things like heat, cold, and even chemicals in the environment can change how a material handles tension stress.
- We can test materials to see how they handle tension stress and use that information to build stronger, safer things.
How Tension Stress Shapes Material Behavior
Tension sounds simple—just pull on a thing and see what happens—but it quietly sets the rules for how parts stretch, thin, and sometimes snap. Tension doesn’t just extend a material; it decides how it will fail or survive. If you like a bit of structure behind the scenes, the basics in mechanics of materials explain why that pull can be friendly or unforgiving.
Elastic Stretch Versus Permanent Deformation
When you load a part lightly, it acts like a spring. Let go, and it snaps back—no harm done. Push harder, and you hit the yield threshold, where the shape change sticks around. That’s the line between temporary stretch and permanent change.
- Elastic zone: straight-line stress–strain, slope is the stiffness (Young’s modulus), full recovery on unload.
- Yielding: the first non-recoverable strain appears; unloading leaves a “set.”
- Plastic flow: more stretch for less added load, often leading to necking before fracture.
Quick gut-check: unload the piece and measure—if the length stayed longer, you’ve moved past elastic and into permanent territory.
Why Ductile Metals Outlast Brittle Counterparts
Ductile metals (think mild steel or aluminum) can deform and spread out the pain. Ceramics and glass? Not so forgiving. Tiny flaws grow fast when there’s no plastic cushion to slow them down.
- Ductile materials blunt cracks, raising the load needed for growth.
- They redistribute stress by flowing, rather than concentrating it at one sharp spot.
- Many slip systems (in FCC metals) make deformation easier and more controlled.
Practical takeaway: if impact, misalignment, or unknown loads are on the table, a ductile pick buys time and warning before failure.
Grain Orientation And Load Direction
Materials aren’t always the same in every direction. Rolling, forging, or 3D printing can line up grains or micro-features, making strength and stretch depend on which way you pull.
- Along the rolling direction: often higher strength, less elongation; across it: sometimes lower strength but more give.
- Welds, heat-affected zones, and build layers create local “weak directions.”
- Shear bands and necks tend to form on planes where slip is easiest.
Quick shop tips:
- Mark the rolling or build direction on stock and keep it consistent in critical parts.
- For new materials, test coupons in two directions before locking the design.
- On drawings, call out orientation so vendors don’t guess—and you don’t get surprises later.
What Happens Inside Under Tension Stress
Tension doesn’t just pull a part longer; it wakes up the tiny features inside the material. Atoms shift, defects move, and some spots get weaker while others harden. If you could shrink down and watch, it would look busy—organized in one moment, messy the next, and always changing with load and time.
Think of tension as a negotiation inside the metal: move defects first, thin out next, and only after that, break.
Dislocations On The Move
Dislocations are line-like defects that let the material reshape without snapping. Under a growing pull, they glide along easy paths called slip planes. The more they move, the more they run into each other, tangle up, and make further motion harder—this is why metals strengthen as you stretch them.
- What gets them going: resolved shear stress on active slip systems
- What slows them down: solute atoms, precipitates, grain boundaries, and other dislocations
- What you feel macroscopically: a clear yield point, then rising strength with continued strain (work hardening)
- What changes with structure: FCC metals allow many slip paths (more stretch), while HCP metals have fewer (less give)
Microvoids, Necks, And Localized Strain
Once work hardening can’t keep up with the applied load, strain stops spreading evenly and begins to pile up in one region. That zone thins—this is necking. Inside the neck, tiny voids start at hard particles or little defects. They grow under the local stress and then join up to form a final crack.
- Nucleate: microvoids start at second-phase particles, inclusions, or decohered interfaces
- Grow: higher triaxial stress in the neck inflates voids and stretches ligaments between them
- Link up: voids merge into a continuous crack, giving the classic dimpled fracture surface
Practical signs you can see: a narrow waist on the specimen, shear lips near the edges, and a sudden drop in load right before it lets go.
Phase Boundaries And Weak Links
Real alloys aren’t uniform. Grains meet at boundaries, and many metals carry particles, precipitates, or retained phases. These internal borders don’t always share loads evenly. Stiffness mismatches and residual stresses can start tiny separations that later grow under tension.
- Grain boundaries: can block dislocations (good for strength) yet sometimes guide cracks along the boundary when embrittled
- Hard particles: raise strength but may act like little anvils that start voids around them
- Precipitates: tune yield strength but, if coarse or continuous at boundaries, can reduce toughness
- Porosity and stringers: leftover processing defects that amplify local stress and invite early fracture
Cracks almost always start at a microstructural mismatch, not in the perfect crystal.
If you’re picking materials or heat treatments, the goal is simple: keep the good barriers to dislocation motion without building fragile interfaces that crack under pull.
Crack Growth And Fatigue Under Tension Stress
Tension loads don’t just pull; they change how tiny flaws behave over time. Under repeated cycles, the quiet wear-and-tear turns into growth at a crack tip, and that’s when life gets interesting. The good news: you can read the signs and slow it way down.
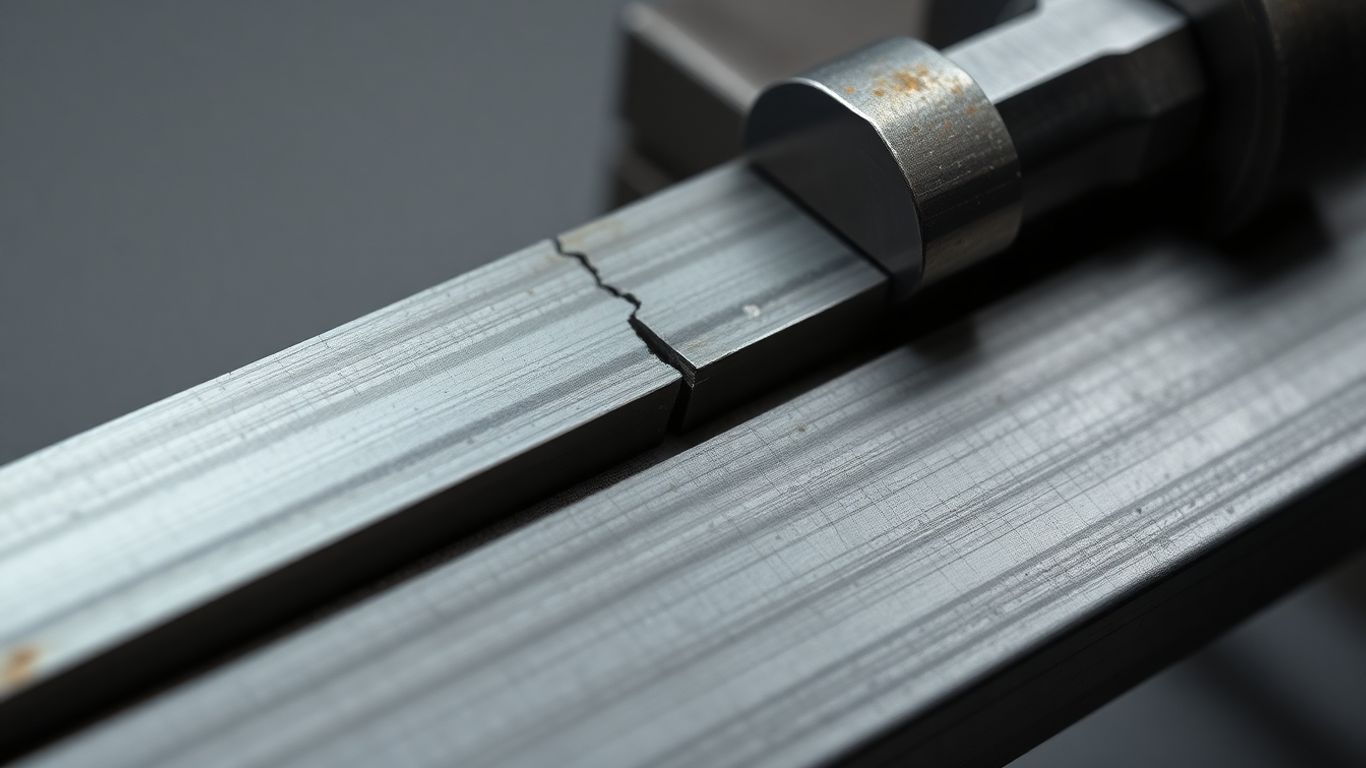
From Tiny Flaws To Runaway Fracture
A part almost never fails out of nowhere. It starts with minuscule defects—pores, inclusions, machining scratches—that act like little antennas for stress. Each load cycle nudges the crack tip forward a hair. At first the progress is slow and boring, then one day it isn’t.
Small flaws aren’t harmless—under repeated tension they grow into cracks that can break a part.
What actually happens:
- Initiation: micro-damage forms at a hotspot like a surface scratch or inclusion.
- Stable growth: the crack advances a tiny amount each cycle as tip blunting and slip keep adding up.
- Fast fracture: once the tip’s stress intensity nears the material’s toughness, the last few cycles go by in a blur.
- Post-mortem clue: a smooth, beach-marked region (fatigue) transitions to a rough, rapid-break zone.
Stress Concentrators You Can Actually Fix
Anything that sharpens a corner or interrupts load flow will spike local stress: keyways, threads near shoulders, abrupt diameter steps, even a careless tool mark. The fix list is refreshingly practical:
- Add generous radii and fillets; avoid knife edges.
- Blend shoulders and counterbores with smooth transitions.
- Move threads away from high-tension zones or use rolled threads.
- Use proper washers/bushings so loads stay aligned and even.
- Knock down burrs; don’t leave hard starts and stops from tooling.
- Add compressive surface stress where it counts (shot peen, cold work, interference fits).
- Control assembly so the primary load path is straight, not offset.
When you need to compare options quantitatively, models of fatigue crack growth help you see how different geometries or treatments change life.
Surface Finish And Notches That Matter
Surface finish is not vanity—it’s fatigue life. A rough surface is a field of tiny notches, and notches love to start cracks. A few practical habits go a long way:
- Target a finer Ra in tension hot-spots; polish in the direction of principal stress.
- Break sharp edges; even a small chamfer helps.
- Remove grinding burns and smeared metal; they hide tensile residual stress.
- Prefer rolled threads over cut threads in high-cycle parts.
- Consider isotropic superfinishing or electropolishing for stressed surfaces.
- Add hard, compressive skins (nitriding, carburizing) when the core must stay tough.
Keep it simple: smoother surfaces, rounder transitions, and compressive layers buy time before cracks get legs.
Environment And Temperature Effects On Tension Stress

Real parts don’t live in a neat, climate‑controlled lab. They see heat waves, cold snaps, salt spray, sun, and spilled solvents. Small shifts in temperature or chemistry can flip a part from safe to risky.
Treat the environment like another load case—because it is.
Heat Softens While Cold Turns Glassy
Heat usually lowers strength and stiffness. Metals relax and can creep under steady pull. Polymers near their glass transition start to feel rubbery; adhesives and seals soften. Cold does the opposite: strength may go up, but toughness drops, so cracks run faster. If you’ve ever snapped a plastic zip tie right out of the freezer, you’ve seen this in action. Temperature swings also create thermal expansion mismatch, which stacks extra tension on fasteners and joints.
- Check data at the temperatures you’ll actually see, not just room temp; yield strength and modulus change with heat or cold.
- Watch for creep at high temperature (a simple rule: metals can creep when the service temperature is roughly a third of their melting point, in absolute scale).
- For cold service, avoid sharp corners; use generous radii and notch‑tolerant grades to cut brittle breaks.
- Confirm a polymer’s glass transition and service range; dark parts in sun can run hotter than the air.
- Allow for movement: slots, expansion gaps, and flexible joints reduce locked‑in thermal stress.
Corrosion And Hydrogen Make Cracks Sneaky
Corrosion pits act like little notches that boost local tension. In some mixes of metal, stress, and fluid, stress corrosion cracking can start and grow with very little warning. Hydrogen from plating, pickling, wet H2S, or even aggressive cathodic protection can diffuse into high‑strength steels; hydrogen embrittlement can make tough steel behave like glass.
- Pick materials and tempers that resist SCC; very high hardness is risky.
- Keep sustained tension lower; if you can, add surface compression (peening or rolling) to fight crack start.
- Control the chemistry: limit chlorides, keep pH in a friendly range, and avoid stagnant traps.
- Treat coatings and plating carefully; remove trapped hydrogen with a bake when specs call for it.
- Smooth finishes help—fewer pits mean fewer places for cracks to get started.
Moisture, UV, And Time In Service
Water sneaks in. Polymers and composites can absorb moisture, swelling and losing stiffness. Freeze–thaw cycles wedge microcracks wider. UV light breaks polymer chains, chalks the surface, and turns a smooth skin into a crack nursery. Metals aren’t spared—humidity and salt speed corrosion fatigue. Time adds its own load: long holds let creep grow, and small cracks lengthen with each cycle.
- Keep water out and moving: seal edges, add drains and vents, avoid crevices.
- Add UV defenses: stabilized resins, pigments, paints, or simple covers.
- Schedule inspections by both calendar and load cycles; small cracks love to hide.
- Store spares dry and shaded; label expected temperature and humidity limits.
- Track service history so replacement happens before the part does.
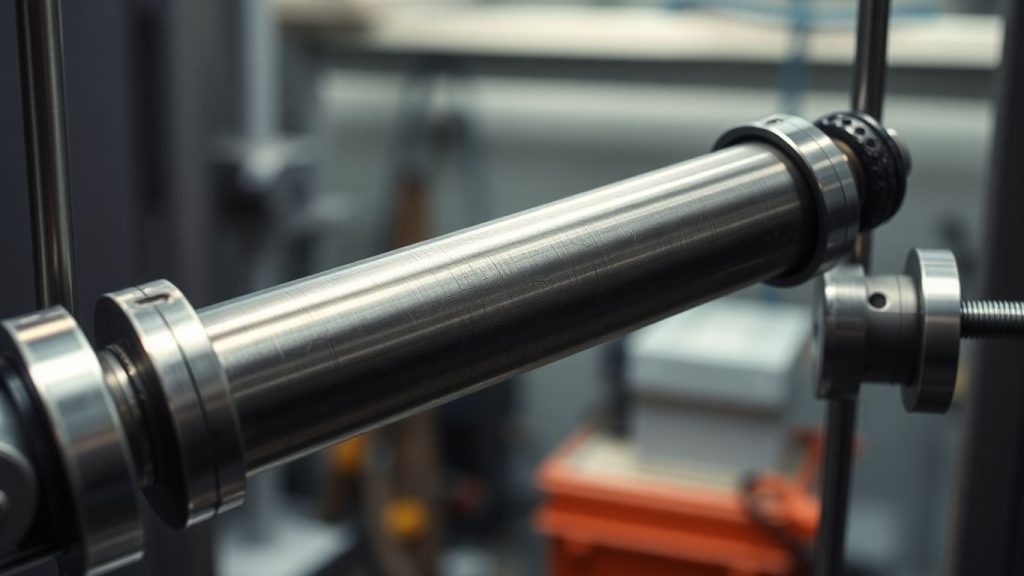
Tension Stress Testing That Tells The Truth
Getting honest numbers out of a tensile test isn’t about fancy graphs—it’s about solid setup, clean measurement, and reading the curve without fooling yourself. Test setup quality matters more than any fancy post-processing.
Specimen Geometry And Grip Choices
Geometry sets the stage. Dog-bone shapes reduce stress at the shoulders so the break happens in the gage. Thickness, width, and fillet radius all steer where strain piles up. Grips matter just as much: the wrong jaws will slip or chew up the ends.
- Match jaw faces to the material: smooth or rubberized for soft metals and plastics, serrated or diamond for hard steels.
- Use proper clamping pressure; too light slips, too heavy bruises the ends.
- Keep the load line straight with alignment fixtures or spherical seats to cut bending.
- Pick a gage length long enough to average local variations but short enough to avoid end effects.
- For thin sheets or composites, add tabs to spread load and save the specimen from edge damage.
Strain Measurement You Can Trust
Crosshead displacement lies because of frame and grip compliance. Go with a clip-on extensometer or optical/DIC when you can, especially near yield. Calibrate, zero, and sample fast enough to catch yield point drops and early necking.
- Use a calibrated extensometer for modulus and yield; switch to DIC if contact is risky or strain is nonuniform.
- Set data rate high (≥100 Hz for brittle stuff or jerky yield; slower is fine for slow, ductile pulls).
- Re-zero after preload, and log temperature if heat or cold can skew the reading.
- Don’t filter the life out of the signal—apply light smoothing only after you’ve checked the raw data.
Reading Stress Strain Curves With Confidence
Start with the straight elastic line for modulus. Find yield (0.2% offset is common), then watch work hardening up to UTS. After that, load drops in engineering terms because of necking—switch to true stress–strain if you need real flow strength beyond uniform elongation.
- Wavy “elastic” regions usually mean misalignment, loose grips, or a noisy extensometer.
- Sudden strain jumps with steady load often point to grip slip.
- A plateau or serrations can be real (Lüders, PLC) or fake (sampling/filtering issues)—check video and notes.
- Early breaks at the shoulder scream poor radii or rough jaws; look at the fracture location.
If the elastic segment isn’t straight, check alignment or strain measurement before blaming the material.
Design Moves That Reduce Tension Stress Risks
I’ve seen more parts fail from sharp corners than from “weak” metal. The nice part is you can fix a lot of tension trouble on the drawing board. Small geometry changes often cut peak tension stress far more than swapping to a stronger alloy.
Start with the worst notch; that’s where cracks like to begin.
Radii, Fillets, And Smooth Transitions
Corners are stress magnets. Any abrupt change in thickness or width pushes tension into a tiny area, and that’s where cracks kick off. Think smooth shapes, steady load paths, and gentle hand-offs between features.
- Use generous inside radii at corners. As a simple rule, try for at least 0.5× section thickness; 1.0× is even better when space allows.
- Blend steps with gradual tapers (something in the ballpark of 1:3 to 1:10 length-to-change works well).
- Add relief at the ends of slots and keyways: teardrop ends or small drilled reliefs spread stress.
- Keep threads out of the highest-tension zone; use a shoulder with a smooth undercut radius and prefer rolled threads when possible.
- Smooth the root of every fillet in tension with a light polish; align tool marks with the load direction.
- Deburr and round hole edges; avoid big jumps in width right next to a hole or notch.
Material Selection For Real-World Loads
It’s tempting to chase the highest strength number on a datasheet. Tension failures often happen when ductility runs thin, toughness is low, or the environment is ugly. Pick materials that keep their cool in your conditions.
- Favor a solid yield strength with good elongation and reduction of area; skip ultra-brittle options even if their ultimate strength looks impressive.
- Check impact toughness at your service temperature (especially if it gets cold).
- Match product form to the load path: forgings with flow lines along the main tension axis; plate with grain direction aligned; in composites, point the fibers where the tension lives.
- Design for fatigue, not just one big pull. High-strength steels can be touchy at high cycles; sometimes a slightly lower-strength but tougher grade lasts longer.
- Factor in corrosion. Some alloys resist stress corrosion cracking better than others; coatings or inhibitors may be worth it.
- Watch thickness effects. A grade that behaves nicely in thin sections can turn brittle in thicker parts; specify fine-grain or controlled chemistry when needed.
- Clean steel matters. Fewer inclusions (cleaner melts) mean fewer places for a crack to start.
Surface Treatments That Add Toughness
Treatments that push a compressive skin into the surface or remove sharp tool marks can give a big bump in fatigue life under tension.
- Add compressive stress: shot peening, laser peening, or deep rolling on fillets, threads, and hole edges. Control intensity and coverage; mask bearing or sealing surfaces.
- Harden the case, keep the core tough: nitriding for low distortion, carburizing for wear-intensive spots, or induction hardening for shafts and shoulders.
- Upgrade the finish where tension is highest. Remove machining marks, keep edges broken (not sharp), and aim for a smoother Ra so micro-cracks don’t get a head start.
- Coat smart: anodize aluminum, passivate stainless, or use PVD/DLC and paints to fight wear and corrosion. If you plate (zinc, cad), bake afterward to reduce hydrogen embrittlement risk.
- Consider a stress-relief heat cycle after heavy machining or welding so residual tension doesn’t stack with service loads.
Design is your first line of defense against tension problems. Get the geometry smooth, pick a material that forgives, and finish the surface so tiny flaws don’t turn into big messes.
Smarter Models For Predicting Tension Stress Failure
Models fall down when they skip the messy stuff that actually breaks parts. We can do better with simple steps that add realism without turning every analysis into a science project. You’ll see where the weak spots live, long before the test rig does.
From Simple Assumptions To Nonlinear Insight
We all start with straight lines: stress goes up, strain goes up, and the math is neat. Real parts don’t play nice. Metals yield, necks form, polymers stretch like taffy, and temperature or strain rate changes the game.
- Start linear to frame the problem. Hand-calc the nominal stress, check section areas, and spot obvious hot spots.
- Step up to nonlinear when any of these show up:
- High local strain or visible necking in tests
- Notches, holes, or sharp transitions
- Temperature swings or fast loading
- Welds, formed edges, or residual stresses
- Use plasticity with strain hardening so the model can “remember” permanent stretch.
- Switch to true stress–true strain data once you pass yield; engineering curves lie after large strain.
- If failure starts in one zone while the rest looks fine, add damage or ductile fracture criteria so the model can predict the moment a crack takes over.
A quick sanity check: if your model needs zero plastic strain but your coupon test stretches like licorice, the model is the problem. Add hardening, consider rate sensitivity, and don’t forget material anisotropy when rolling direction matters.
Finite Element Basics Without The Jargon
Think of FEA as a flexible grid that asks, “How does each tiny piece stretch under load?” Simple idea, easy to mess up. A few habits save hours and keep results honest.
- Model only what matters; trim the geometry and use symmetry when you can.
- Apply loads and constraints the way the fixture works, not how you wish it worked.
- Refine the mesh where stress jumps: fillets, holes, thread roots, and contact edges.
- Check reactions vs. applied loads; they should balance within a hair.
- Run a coarse mesh first, then tighten it until peak stress barely changes.
- Avoid over-constraining. Let parts move the way they really do.
- Compare to one known case (coupon, simple bracket). If it can’t match that, don’t trust the fancy run.
If the model can’t match a simple tension test, it won’t predict a complex part.
Data-Driven Safety Factors That Make Sense
Old-school safety factors were one-size-fits-none. You can keep them simple and still tie them to reality using data.
- Build the picture from the bottom up:
- Gather scatter: coupon tension tests across batches, temperatures, and load rates.
- Define load uncertainty from use cases, duty cycles, and instrumented hardware when possible.
- Use your model to map load to stress/strain at the hot spot.
- Turn scatter into risk:
- Treat strength and loads as distributions (not single numbers).
- Run a quick Monte Carlo to get probability of failure at the hot spot.
- Pick a target reliability (say, 1 failure in 10,000) and read off the safety factor that meets it.
- Keep it honest and live:
- Update with new tests and field returns; let the factor move as the story gets clearer.
- Track surface finish, build process changes, and temperature shifts—they nudge the curve more than you think.
- Report not just the safety factor, but the key assumptions, so future you knows what changed.
It’s not about making the model fancy. It’s about matching how the part is made, loaded, and aged, so the numbers line up with what the lab keeps finding.
So, What's the Takeaway?
Alright, so we've talked a lot about how pulling and stretching can really mess with materials. It's pretty wild how much force it takes to break something, but also how a little bit of stress over time can weaken it. The good news is, knowing this stuff helps us build better, stronger things. Whether it's a bridge, a phone, or even your car, understanding tension stress means we can design them to last. It’s all about making sure things hold up when they need to, so we can all keep moving forward with confidence. Pretty neat, right?
Frequently Asked Questions
What happens to a material when you pull on it?
When you pull on something, like a rubber band, it stretches. This stretching is called tension. If you pull too hard, it might stretch a little and then go back to its original shape. But if you pull even harder, it might stretch and stay stretched, or even break. This depends on what the material is made of.
Why do some things break easily when pulled, while others stretch a lot?
Materials act differently when pulled. Some, like glass, are brittle and snap easily with little stretching. Others, like soft metals, are ductile and can stretch a lot before breaking. This is because of how their tiny parts, called atoms, are arranged and how they move when pulled.
Can small flaws in a material cause it to break?
Yes, absolutely. Even tiny scratches or imperfections on the surface or inside a material can become weak spots. When you pull on the material, these spots can concentrate the pulling force, making it much easier for a crack to start and spread, leading to breakage.
Does the temperature affect how a material behaves under pulling?
It sure does! Heat often makes materials softer and more stretchy, while very cold temperatures can make them stiff and more likely to break suddenly, like glass. Think about how warm butter is soft, but frozen butter is hard and brittle.
How do scientists test materials to see how strong they are?
Scientists use special machines to pull on pieces of material in a controlled way. They measure how much the material stretches and how much force it takes. This helps them understand how strong the material is and how it might fail, which is important for building safe things.
How can engineers design things to be safer against pulling forces?
Engineers use clever design tricks. They might add curves or rounded corners instead of sharp ones, because sharp corners can concentrate pulling forces and cause breaks. They also choose materials that are known to be strong and flexible enough for the job, and sometimes treat the surface to make it tougher.